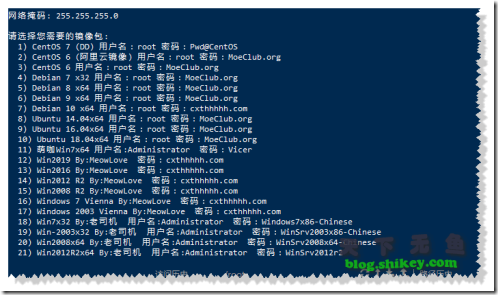
25合1的系统一键DD选择界面,输入99则使用自定义镜像。
以上系统密码不为默认密码的均为网络收集,如有疑虑使用自己的自定义镜像。
wget –no-check-certificate -O NewReinstall.sh https://cdn.jsdelivr.net/gh/fcurrk/reinstall@master/NewReinstall.sh && chmod a+x NewReinstall.sh && bash NewReinstall.sh
25合一系统密码:
1、CentOS 7.7 (已关闭防火墙及SELinux,默认密码Pwd@CentOS)
2、CentOS 7 (默认密码cxthhhhh.com)
3、CentOS 8 (默认密码cxthhhhh.com)
4、CentOS 6 (默认密码Minijer.com)
5、Debian 11 (默认密码Minijer.com)
6、Debian 10 (默认密码Minijer.com)
7、Debian 9 (默认密码Minijer.com)
8、Debian 8 (默认密码Minijer.com)
9、Ubuntu 20.04 (默认密码Minijer.com)
10、Ubuntu 18.04 (默认密码Minijer.com)
11、Ubuntu 16.04 (默认密码Minijer.com)
12、Windows Server 2019 (默认密码cxthhhhh.com)
13、Windows Server 2016 (默认密码cxthhhhh.com)
14、Windows Server 2012 (默认密码cxthhhhh.com)
15、Windows Server 2012 Lite (默认密码nat.ee)
16、Windows Server 2008 (默认密码cxthhhhh.com)
17、Windows Server 2008 Lite (默认密码nat.ee)
18、Windows Server 2003 (默认密码cxthhhhh.com)
19、Windows Server 2003 Lite (默认密码WinSrv2003x86-Chinese)
20、Windows 10 LTSC Lite (默认密码www.nat.ee)
21、Windows 7 x86 Lite (默认密码Windows7x86-Chinese)
22、Windows 7 Ent Lite (默认密码nat.ee)
23、Windows 7 Ent Lite (UEFI支持甲骨文)(默认密码nat.ee)
24、Windows Server 2008 Lite (UEFI支持甲骨文)(默认密码nat.ee)
25、Windows Server 2012 Lite (UEFI支持甲骨文)(默认密码nat.ee)
99、自定义镜像
一键DD脚本集合
VPS主机一键DD安装Windows、Centos、Ubuntu、Debian等系统脚本大集合,曾经我在全球主机论坛里面也看到过类似方法,并且直接在PR主机上成功上车,解决了原系统卡顿的问题。建议最佳办法是自己制作安装包,用别人的出问题应先问问自己。
此工具集合了Linux和WIN包:
Linux:centos6、7; Ubuntu 14 16 18;Debian 7 8 9 10;
Windows:集合了“”萌咖大佬、老司机、MeowLove “”的系统,包含win7 2003 2006 2012 2008 2016 2019等系统。当然也可以自定义。
这个脚本作者没有找到。我看了内容,是用的萌咖大佬的安装脚本集成的,在这里对脚本作者表示敬意。
使用方法
#无论什么时候安装养成良好习惯,更新下源
yum update
#更新会提示你is that OK?(y/n),记得选择y
#安装下wget
yum -y install wget
##镜像文件在OneDrive
wget -N --no-check-certificate https://raw.githubusercontent.com/veip007/dd/master/dd-od.sh && chmod +x dd-od.sh && ./dd-od.sh
 ##镜像文件在GoogleDrive
wget -N --no-check-certificate https://raw.githubusercontent.com/veip007/dd/master/dd-gd.sh && chmod +x dd-gd.sh && ./dd-gd.sh
建议有条件的,打开sh代码,把里面所有的系统镜像到自己的云存储里面,用的会方便一点,国内的onedrive被和谐基本上也是早晚的事情了。
功能补充
执行后会提示以下,友情提示,国内用onedrive镜像,国外的无所谓。
[root@minecn ~]# wget -N --no-check-certificate https://raw.githubusercontent.com/veip007/dd/master/dd-od.sh && chmod +x dd-od.sh && ./dd-od.sh
--2019-12-31 11:59:01--  https://raw.githubusercontent.com/veip007/dd/master/dd-od.sh
Resolving raw.githubusercontent.com (raw.githubusercontent.com)... 151.101.0.133, 151.101.64.133, 151.101.128.133, ...
Connecting to raw.githubusercontent.com (raw.githubusercontent.com)|151.101.0.133|:443... connected.
HTTP request sent, awaiting response... 200 OK
Length: 6026 (5.9K) [text/plain]
Saving to: ‘dd-od.sh’

###########################################################
#                                                         #
#  Auto DD                                                #
#                                                         #
#  Last Modified: 2019-12-05                              #
#  Linux默认密码:MoeClub.org  or  cxthhhhh.com           #
#  Supported by MoeClub                                   #
#                                                         #
###########################################################

IP: 155.xxx.xx.xx
网关: 155.xx.xx.x
网络掩码: 255.255.255.0

请选择您需要的镜像包:
  1) CentOS 7 (DD) 用户名:root 密码:Pwd@CentOS
  2) CentOS 6 (阿里云镜像) 用户名:root 密码:MoeClub.org
  3) CentOS 6 用户名:root 密码:MoeClub.org
  4) Debian 7 x32 用户名:root 密码:MoeClub.org
  5) Debian 8 x64 用户名:root 密码:MoeClub.org
  6) Debian 9 x64 用户名:root 密码:MoeClub.org
  7) Debian 10 x64 用户名:root 密码:cxthhhhh.com
  8) Ubuntu 14.04x64 用户名:root 密码:MoeClub.org
  9) Ubuntu 16.04x64 用户名:root 密码:MoeClub.org
  10) Ubuntu 18.04x64 用户名:root 密码:MoeClub.org
  11) 萌咖Win7x64 用户名:Administrator  密码:Vicer
  12) Win2019 By:MeowLove  密码:cxthhhhh.com
  13) Win2016 By:MeowLove  密码:cxthhhhh.com
  14) Win2012 R2 By:MeowLove  密码:cxthhhhh.com
  15) Win2008 R2 By:MeowLove  密码:cxthhhhh.com
  16) Windows 7 Vienna By:MeowLove  密码:cxthhhhh.com
  17) Windows 2003 Vienna By:MeowLove  密码:cxthhhhh.com
  18) Win7x32 By:老司机  用户名:Administrator  密码:Windows7x86-Chinese
  19) Win-2003x32 By:老司机  用户名:Administrator  密码:WinSrv2003x86-Chinese
  20) Win2008x64 By:老司机  用户名:Administrator  密码:WinSrv2008x64-Chinese
  21) Win2012R2x64 By:老司机  用户名:Administrator  密码:WinSrv2012r2
  22) CentOS 8 用户名:root 密码:cxthhhhh.com 推荐512M以上使用
  自定义安装请使用:bash InstallNET.sh -dd '您的直连'

请输入编号:
之后选择你想安装的系统即可,建议centos7,最好选用1G内存的VPS,win7以上的选择2G的VPS,否则真的跑的很累。
有VNC的可以全程直播观看安装过程,没有的话,我建议多等一些时间。
DD-reinstall魔改版
暂时失效,作者可能正在修复。
它可以通过Internet重新安装CentOS,Debian,Ubuntu,Windows 2003、7、2008R2、2012R2、2016、2019和其他系统(连续添加),并可以通过安装远程网络ISO安装任何系统。 https://cxthhhhh.com/
目前作者博客已经挂了,但是github上的脚本依然可用。本人暂为亲自测试哈,实际上也是根据萌咖大佬的脚本改的。
项目地址:https://github.com/MeowLove/Network-Reinstall-System-Modify
安装方法
#首先安装openssl控件
#RedHat/CentOS:
yum install -y xz openssl gawk file
#Debian/Ubuntu:
apt-get install -y xz-utils openssl gawk file
#下载并执行脚本
wget --no-check-certificate -qO ~/Network-Reinstall-System-Modify.sh 'https://tech.cxthhhhh.com/tech-tools/Network-Reinstall-System-Modify/Network-Reinstall-System-Modify.sh' && chmod a+x ~/Network-Reinstall-System-Modify.sh
#以上脚本失效无法wget,执行下列脚本,里面编码可能会替换错,建议自己从上面替换源地址
wget --no-check-certificate -qO ~/Network-Reinstall-System-Modify.sh 'https://github.com/swjsky/doubibackup/blob/master/Network-Reinstall-System-Modify.sh' && chmod a+x ~/Network-Reinstall-System-Modify.sh
安装说明
1. 所有系统安装完毕的默认密码是[cxthhhhh.com],为了防止暴力破解,你必须在安装完毕立刻修改默认密码!
2. 因硬件配置和网络环境不同,安装全程需要15-60分钟,请耐心等待。安装完成即可通过IP:22(Linux SSH)/IP:3389(Windows RDP)进行连接。
3. 为了稳定性和安全性,我建议所有网站管理员/开发者/公司使用最新的系统,同时我只为最新的系统提供技术支持。
4. 所有镜像托管于Open Disk CDN,你应该访问以下文章了解镜像,使用时应校对MD5和SHA1是否正确。
netboot.xyz
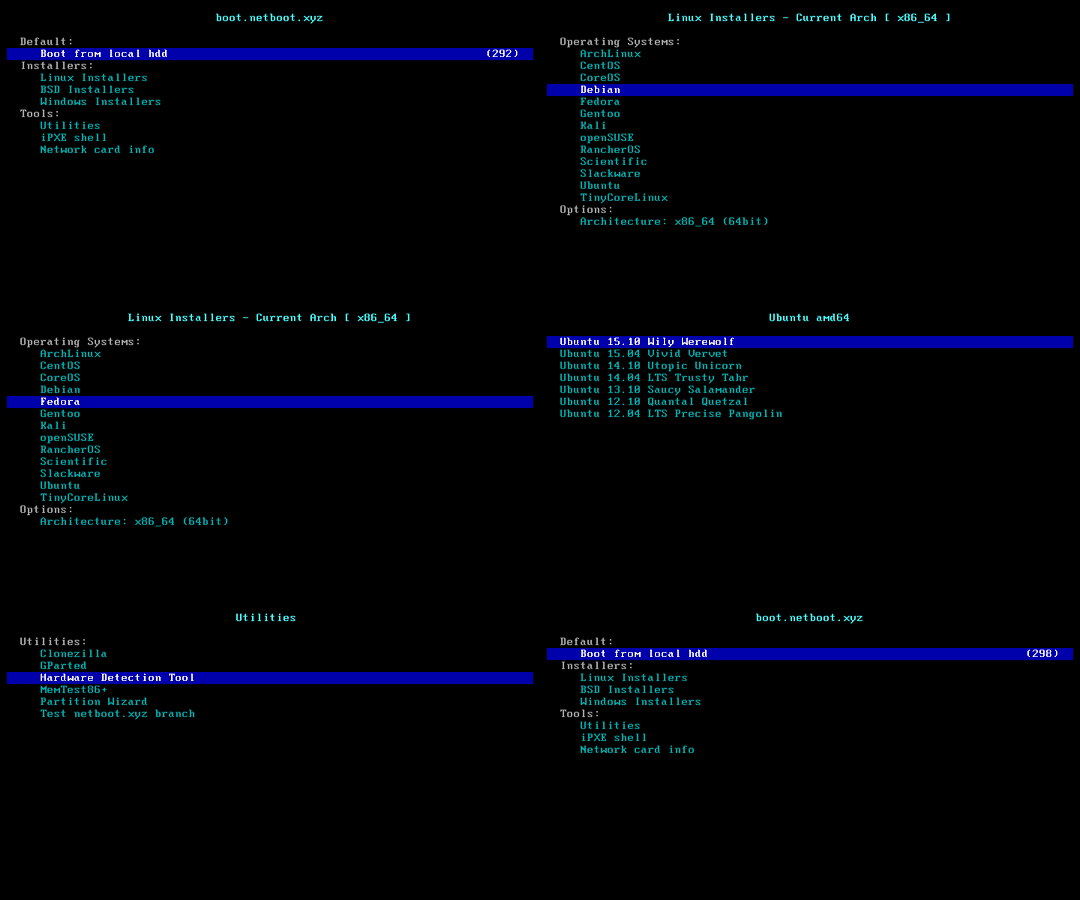
netboot.xyz是一种从BIOS中的一个位置PXE引导各种操作系统安装程序或实用程序的方法,而无需检索介质即可运行该工具。 iPXE用于在BIOS中提供用户友好的菜单,使您可以轻松选择所需的操作系统以及任何特定类型的版本或可启动标志。
您可以将ISO远程连接到服务器,可以在Grub中将其设置为救援选项,甚至可以将您的家庭网络设置为默认引导到该网络,以便始终可用。
目前我只成功了一次,新手迫不得已可以考虑一下,尽量不要用,有待更新。
安装方法
有VNC的换就简单很多,首先在控制面板内,设置好你的启动方式
参考这里安装https://github.com/netbootxyz/netboot.xyz
无VNC的,可以通过docker安装。
docker build -t localbuild -f Dockerfile-build .
docker run --rm -it -v $(pwd):/buildout localbuild
 主机优惠
主机优惠

